This was apartment with good ‘bones’ on MacArthur Blvd. in Oakland, California. This was a ground-floor one-bedroom unit that had not been consistently occupied.
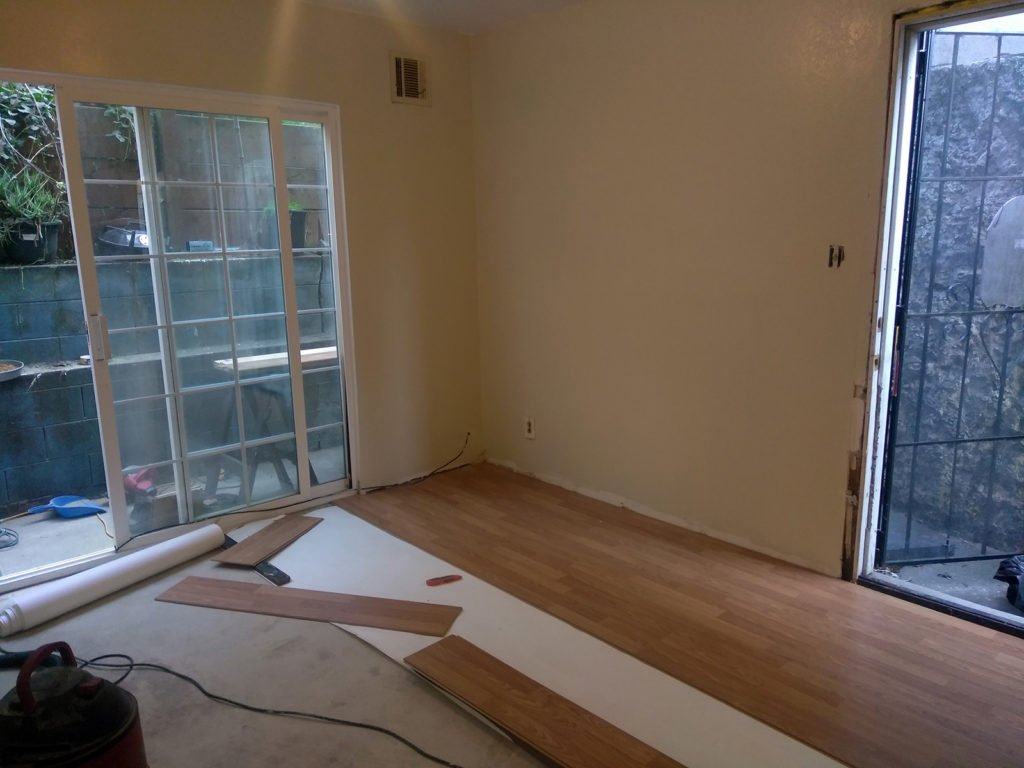
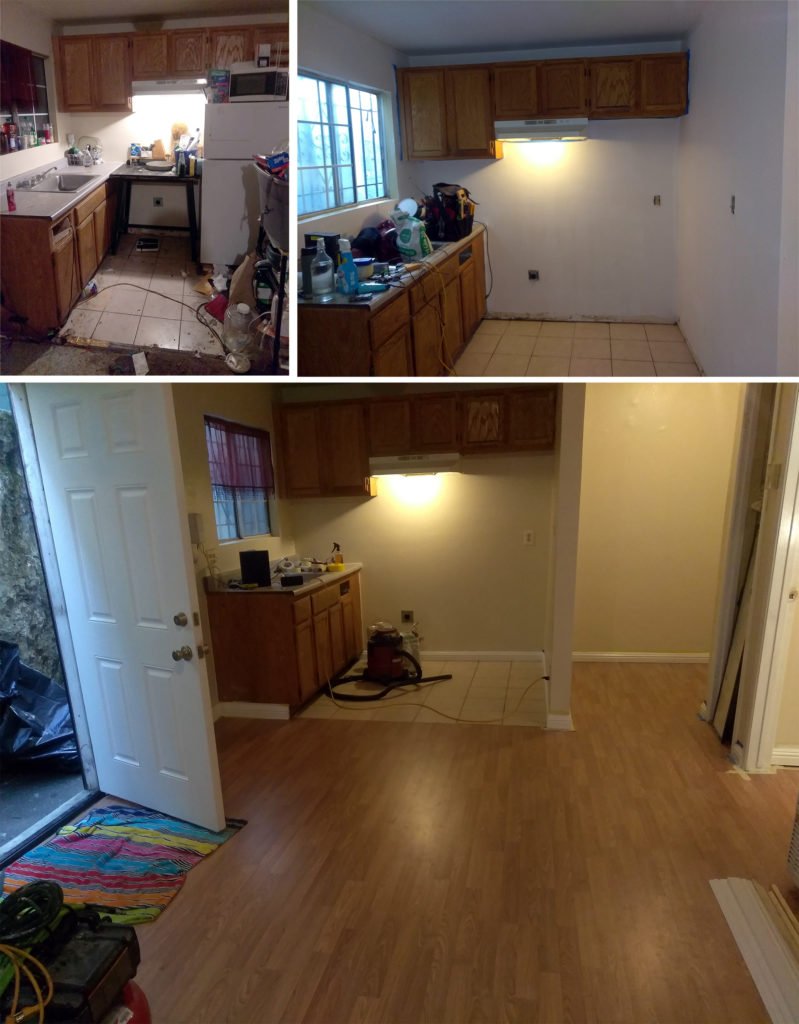
It was partly storage and partly a shelter for squatting cats – the client/owner had a big heart. We won’t show pics of how it looked when we initially came through to measure, but take this image (below) and extrapolate throughout the entire apartment. It was in need of some attention.
Initially the client had a budget (about $3,000) and wanted maximal results within that budget. Fair market might be twice that, but we liked the client and considered it partly a marketing opportunity, and calculated that the before/after photos would be striking. And we were right.
It needed to be emptied and seriously cleaned. These are not what we do (we do installations). Otherwise, it needed flooring, prime and paint (all walls and ceilings), trim (including window and door framing), and kitchen cabinets/countertops. We had planned on going to Habitat ReStore and getting new hanging and floor cabinets, to keep costs low. It would have been a reach to do all this on $3,000 – including materials – but we love a challenge.
Before we began, a second point of contact (with the checkbook) said they would take over the kitchen. Again – we saw an opportunity for dramatic before/after pics, and were happy to roll with this. Typically, reduction to the scope of a contract (after we have received a deposit) is not welcome or could require more dialogue; a second point of contact is against our contract. Neither was an issue here.
After being emptied and seriously cleaned (by laborers), the new contact ground-down the carpet tack strips and sanded the concrete slab, ahead of the engineered flooring installation. We installed a Roberts silicon underlayment to prevent moisture penetration through the ground-floor slab.
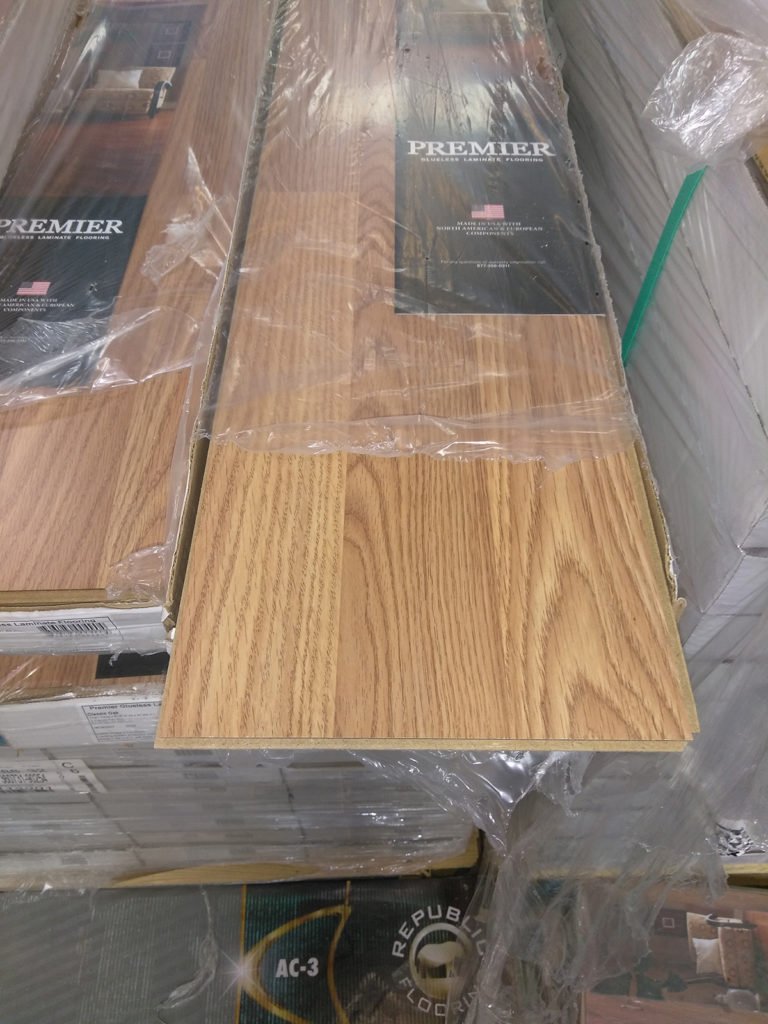
We purchased a three-plank laminate flooring at ReStore for $1.09 a square foot. The unit was roughly 400 square feet, with 350 square feet to be covered (exempting the kitchen and bathroom). This was not slide-and-click laminate flooring, but the scoop-groove kind (vs. tongue-in-groove hardwood). In essence, it is easier to lock in. Also the plank width was close to 10″. As expected, it went in quickly and affordably. Obviously doesn’t have the feel or aesthetic of wood, but we were on an impossible budget. The floor ended up costing $400 or so after tax.
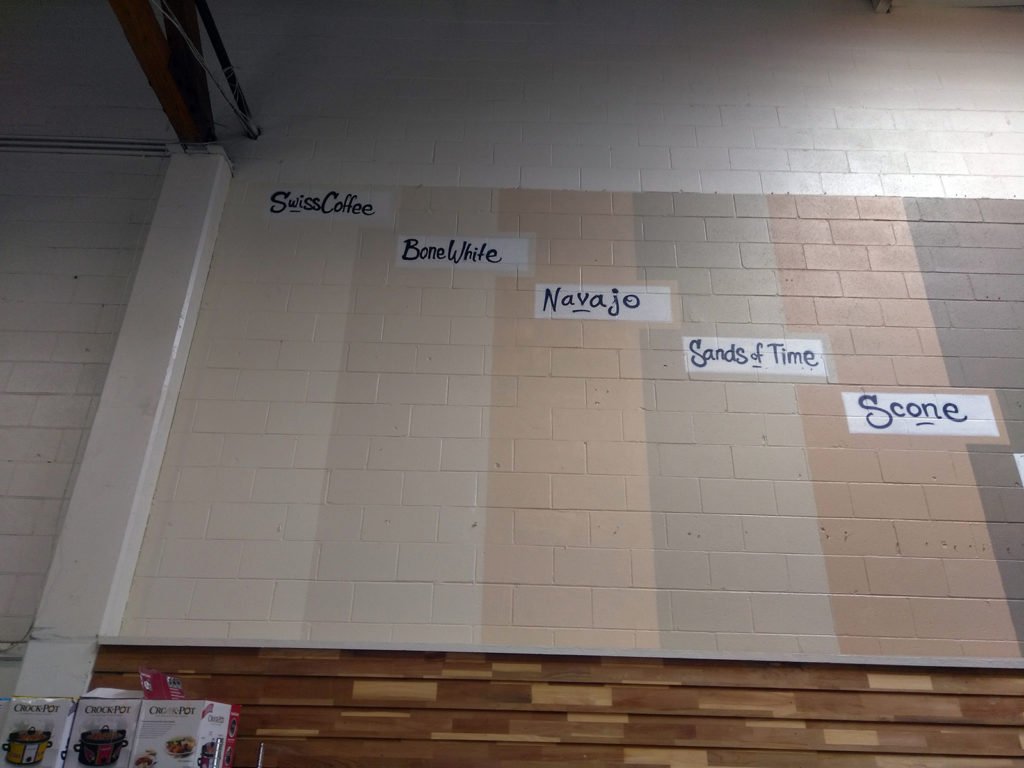
We got a great deal on interior latex paint (semi-gloss). We prefer matte or flat for a contrast against the gloss paint of the trim (it’s a clean look that never gets old), but this would do. Went with Bone White.
Here they are going in.
With a remodel like this, you want to do the wall paint first, then flooring, then trim (then painting the trim). The trim has to go in after the flooring (because it goes over the floor), and if you put the flooring in first, so that you can do all the painting at once (as you might see in new construction) you have to cover everything with drop cloths, to protect it. With new construction, most everything is covered, anyway, because of workers clomping in and out for weeks or months on end.
It’s really a matter of preference whether to do paint – floor – trim installation, or floor – trim installation- paint (including trim). We chose to paint the walls before installing the flooring.
We don’t have good ‘before’ pics of the walls, but here are some photos that we took after the primer was up.
A new range and refrigerator were purchased for the unit. When they have the disposable money, we will probably come back to replace the cabinets and countertops with a pre-measured solution from Ikea. This will be very cost-effective.
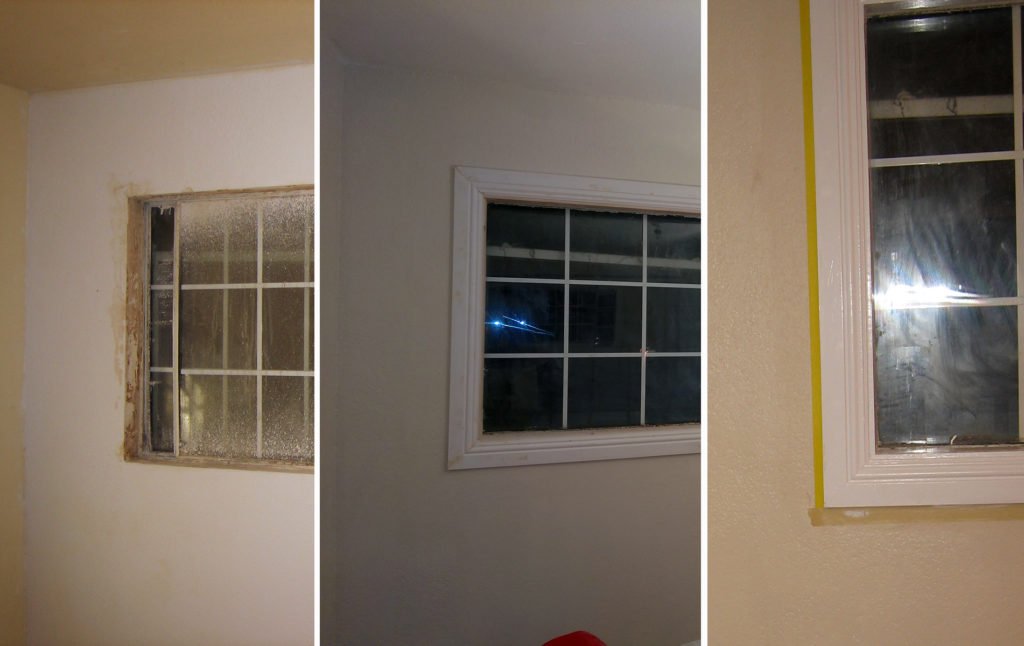
WINDOW CASING
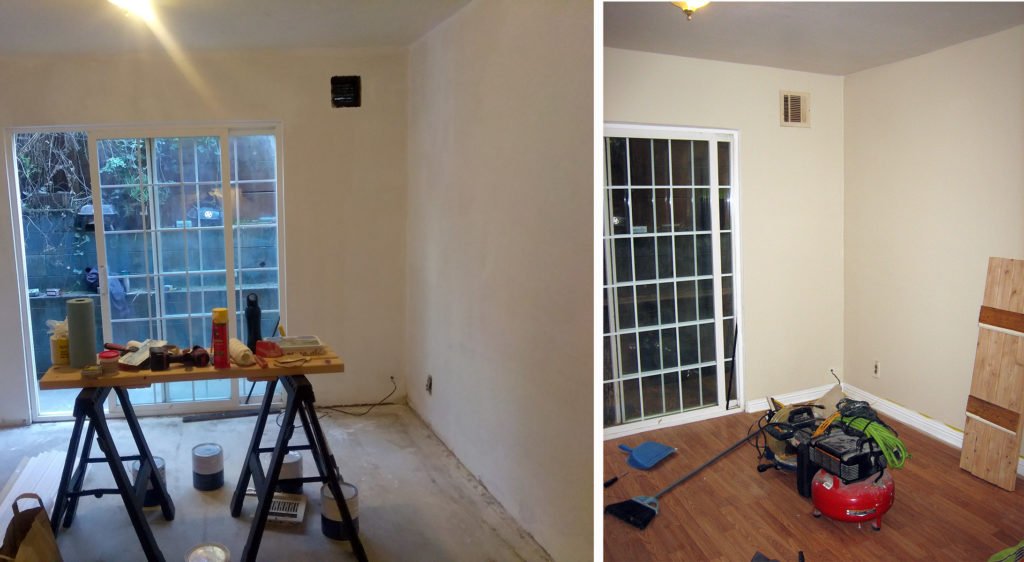
LIVING ROOM CORNER
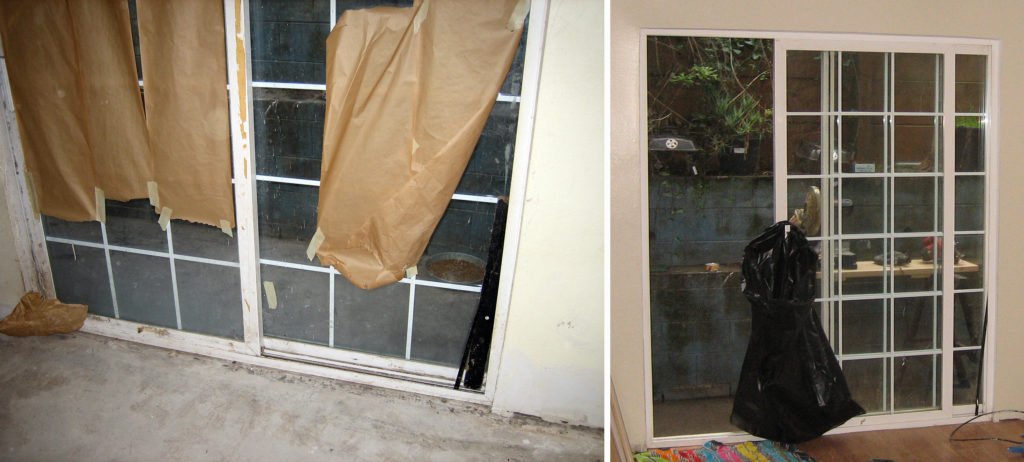
SLIDING DOOR
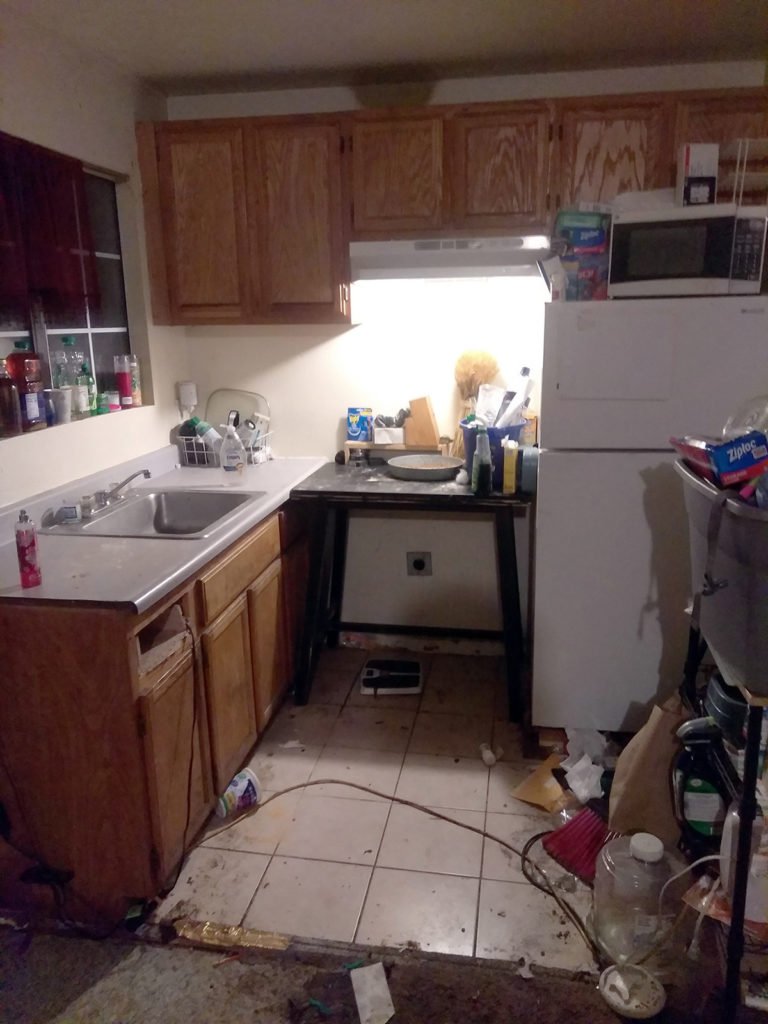
KITCHEN
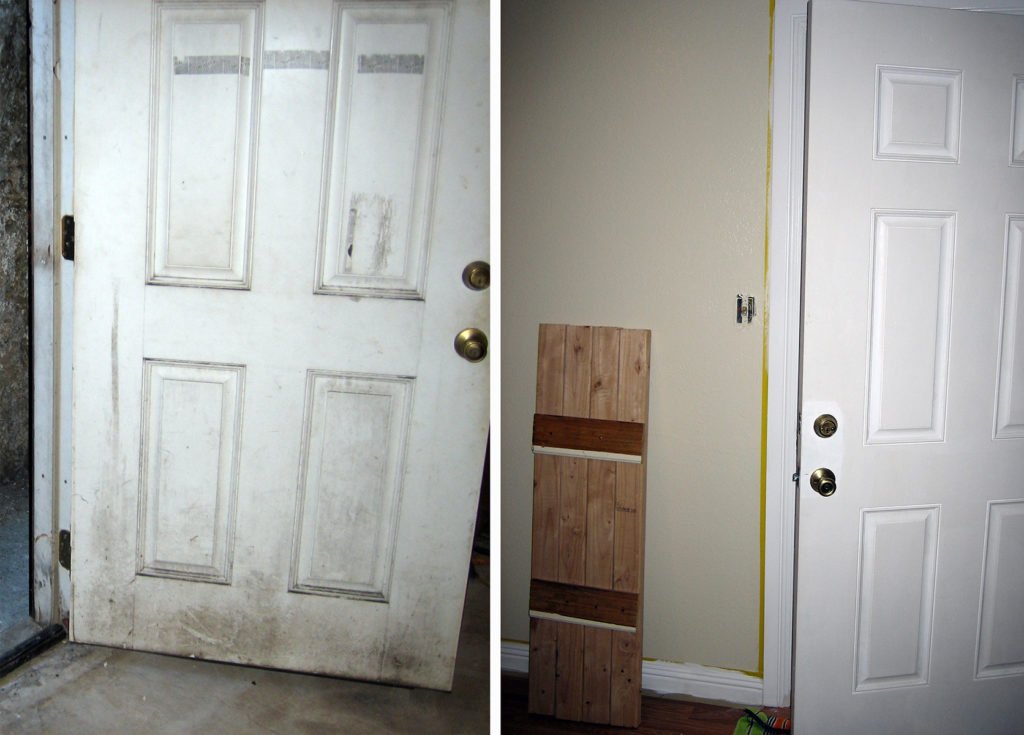
FRONT DOOR